
 FIG·01
To add a landing to stairs in ArchiMaster 3D, insert an L-shaped or U-shaped stair object from the Stair library, then break the run at the landing by editing the stair's properties. Set the landing depth to match the stair width, keep risers between 4 and 7 3/4 inches, and adjust the railing offset so the handrail does not reduce clear width. The workflow is the same in ArchiMaster 3D Ultimate Home Design, Landscape & Deck, Kitchen & Bath, and Expert, though the Expert edition adds more railing and newel controls. This tutorial covers the exact steps, the code numbers that matter, and the one adjustment most users miss: the landing is a floor, not just a gap filler. The stair and landing tools are part of the core home design software engine, so you do not need a separate plugin to model a complete staircase.
- A landing in a stair run must be at least as deep as the stair is wide, with a 36-inch minimum in the direction of travel under the 2021 IRC.
- In ArchiMaster 3D, start with the preset L-shaped or U-shaped stair with landing; then edit riser height and landing depth in the Properties panel.
- Set riser height between 4 inches and 7 3/4 inches; after changing it, ArchiMaster 3D recalculates the number of treads.
- Adjust the railing offset to 1 1/2 inches on open sides so the handrail does not reduce the required clear width on the landing.
- Check the landing as a separate floor object so material takeoff includes its framing, not just the stair stringers.
Choose the Right Stair Type: L-Shaped vs U-Shaped
Start in the Stair library, not by drawing a custom box. ArchiMaster 3D includes preset L-shaped and U-shaped stairs with landings. An L-shaped stair makes one 90-degree turn, creating a single landing that changes direction. A U-shaped stair makes a 180-degree turn, with two parallel flights separated by one landing. Both are built on the same stair engine, so the riser and tread rules apply identically. If you already placed a straight stair, open its Properties, change the Type field to L-shaped or U-shaped, and the software inserts a landing automatically. You can also model a landing manually as a floor platform, but the preset is faster and less error-prone. The stair tools live in the features set, so every ArchiMaster 3D edition can access them.

Why the landing depth usually defaults too short
The preset landing often defaults to 36 inches deep. That meets code only if your stair width is 36 inches or less. If you widen the stair to 42 inches, the landing must also be 42 inches deep in the direction of travel. In ArchiMaster 3D, the landing depth is a separate parameter from the stair width. After changing the stair width, open the Landing section in the stair properties and set the depth to the same value. Leaving the default at 36 on a 42-inch stair is the single most common stair modeling mistake. It passes visual inspection but fails a building department plan review because the turning space is too shallow. Check this before you adjust any riser or railing setting.
Set Code-Friendly Riser Height and Landing Depth
The 2021 International Residential Code (IRC) sets the maximum riser height at 7 3/4 inches and the minimum at 4 inches. The maximum difference between the tallest and shortest riser in a flight is 3/8 inch. Tread depth must be at least 10 inches with a nosing, or 11 inches without one. A landing must be at least as deep as the stair is wide, with a 36-inch minimum in the direction of travel. In ArchiMaster 3D, you control these numbers in the stair properties. You can either enter the total rise and let the software choose the riser count, or set a specific riser height and let it calculate the number of treads. When a landing splits the stair into two runs, each run gets its own rise values. Set both runs to the same riser height to keep the variation under the 3/8-inch limit.

A worked example: 106-inch total rise
Suppose the finished floor to finished floor rise is 106 inches. The maximum allowed riser is 7.75 inches, so the minimum number of risers is 14, because 106 divided by 7.75 is 13.68, and you round up. Splitting the stair into two equal runs gives 7 risers per run. Each riser is then 106 divided by 14, or 7.57 inches. The landing elevation after the lower run is 7 risers times 7.57 inches, or 53 inches. In ArchiMaster 3D, set the lower stair to 7 risers at 7.57 inches, then set the landing height to 53 inches. Set the upper stair to 7 risers at 7.57 inches as well. The total rise stays exact, and the riser variation is zero. If you need a different landing height because of a window or door, adjust the lower run's riser count, then recalculate the upper run so the total rise still works out.
Placing the Landing and Adjusting Railings
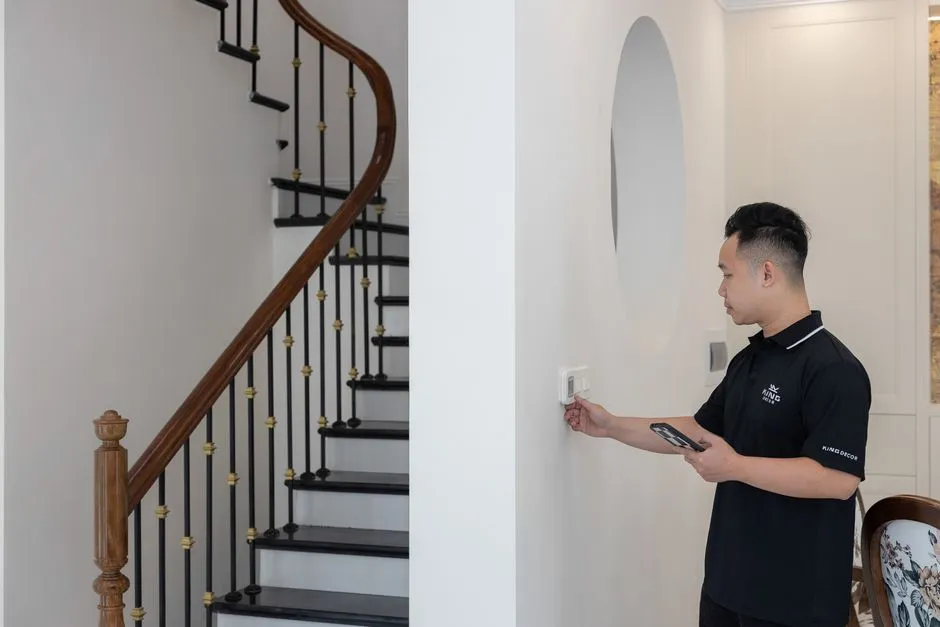
In ArchiMaster 3D, the landing sits between the lower and upper flights. To move it, select the landing object and drag it along the turn direction, or enter a specific elevation in the Properties panel. The software snaps the connected flights to the landing edges. Keep the landing rectangle aligned with the stair runs; an angled or offset landing can produce irregular tread cuts at the connection. On the railing side, select the stair railing and open its offset setting. The default guard often sits directly on the tread edge. For an open side, set the railing offset to 1 1/2 inches from the nosings so the handrail does not narrow the required clear width. On a closed side with a wall, keep the offset smaller or zero, but confirm that drywall and trim are included in the wall thickness.
Railing offset and guard height
Guard height must be at least 36 inches above the landing surface for residential stairs under the IRC. Handrail height must be between 34 and 38 inches above the stair nosing. In ArchiMaster 3D, railings and guards are separate controls. Set the guard height to 36 inches at the landing, and set the handrail height to 34 to 38 inches along the sloped flights. The offset matters most at the landing because that is where the clear walking width is measured. A common error is to model the railing centerline on the stair edge, which can subtract 1 1/2 to 2 inches from the usable width. Move the railing outward on open sides, and check the landing width from the inside face of the guard to the opposite wall.
Check Materials and Export for Permit Review
Before you export, treat the landing as a floor platform rather than a stair component. In ArchiMaster 3D, open the landing's material properties and confirm it reports framing, subfloor, and finish layers. If the landing does not appear in the material takeoff, select it and assign a floor or platform assembly. This step matters for estimating lumber, sheathing, and finish material costs. The stair run itself reports stringers, treads, and risers, but not the landing deck. After assigning the assembly, run a material list and confirm the landing square footage appears. For permit drawings, set the drawing scale to 1/4 inch equals 1 foot, add a stair section with riser and landing dimensions, and export a PDF. The dimension annotations include the 36-inch landing depth and the 7 3/4-inch maximum riser, which is what a plan reviewer checks first.
- Choose an L-shaped or U-shaped stair preset rather than modeling a landing from a box.
- Set landing depth equal to the finished stair width, and no less than 36 inches in the direction of travel.
- Keep riser height between 4 and 7 3/4 inches, and keep the variation between adjacent risers under 3/8 inch.
- Set the railing offset to 1 1/2 inches on open sides so the handrail does not narrow the landing clear width.
- Assign a floor assembly to the landing so material takeoff includes its framing and finish layers.
“A landing is a floor that happens to turn people around, not a gap between flights.”, ArchiMaster 3D Journal, Stair Design Rule of Thumb
- Can I add a landing to an existing straight stair in ArchiMaster 3D?
- Yes. Select the straight stair, open its Properties, and change the Type field to L-shaped or U-shaped. ArchiMaster 3D inserts a landing automatically. Then set the landing depth to match the stair width and adjust the split risers so both flights meet the 3/8-inch tolerance.
- What is the minimum landing size for a U-shaped stair?
- The landing must be at least as deep as the stair is wide, with a 36-inch minimum in the direction of travel. For a 42-inch-wide U-shaped stair, the landing should be 42 inches by 42 inches. Many local codes allow a 42-inch by 42-inch landing for a 180-degree turn with a center handrail.
- How do I change the landing height without changing the risers?
- Select the landing object and enter a new elevation in the Properties panel. ArchiMaster 3D keeps the connected flights attached, but you must recalculate the upper run's riser count and height so the total rise remains exact. A lower landing means the upper run gains risers; a higher landing means it loses risers.
- Does ArchiMaster 3D include the landing in the material takeoff?
- Only if the landing is assigned a floor or platform assembly. Open the landing's material properties and assign a floor assembly with framing, subfloor, and finish layers. Then run a material list and confirm the landing square footage appears. The stair run alone reports stringers, treads, and risers, but not the landing deck.
Ready to model a code-compliant landing? Try the full stair and landing toolset in ArchiMaster 3D free for 14 days.
Download free trialReady to design with confidence?
See which edition fits the space you’re designing.