
 FIG·01
Most kitchen remodel mistakes happen before the first cabinet is ordered, not after. The fastest way to prevent an island that blocks the refrigerator, a dishwasher door that hits the sink cabinet, or a walkway that feels too tight is to build the room in 3D home design software first, test every clearance, and only then commit to a layout. This guide shows how to go from a measured as-built room to a photorealistic kitchen preview, including the exact checks that catch expensive fit problems early.
- Model the room from an accurate as-built plan first; ceiling height, window positions, door swings, and plumbing rough-ins are as important as wall length.
- Test at least two layouts with different island and cabinet placements; moving an island 12 to 18 inches often fixes a cramped aisle before you spend anything.
- Use a true-to-scale library for cabinets and appliances, not generic boxes, because real door swings and product depths reveal fit failures early.
- Switch between top-down, elevation, and first-person 3D views to catch clearance, lighting, and sightline problems that a 2D plan cannot show.
- Export the final model with dimensions and a material list to get accurate quotes and give contractors a clear brief.
Start With a Measured Floor Plan, Not a Mood Board
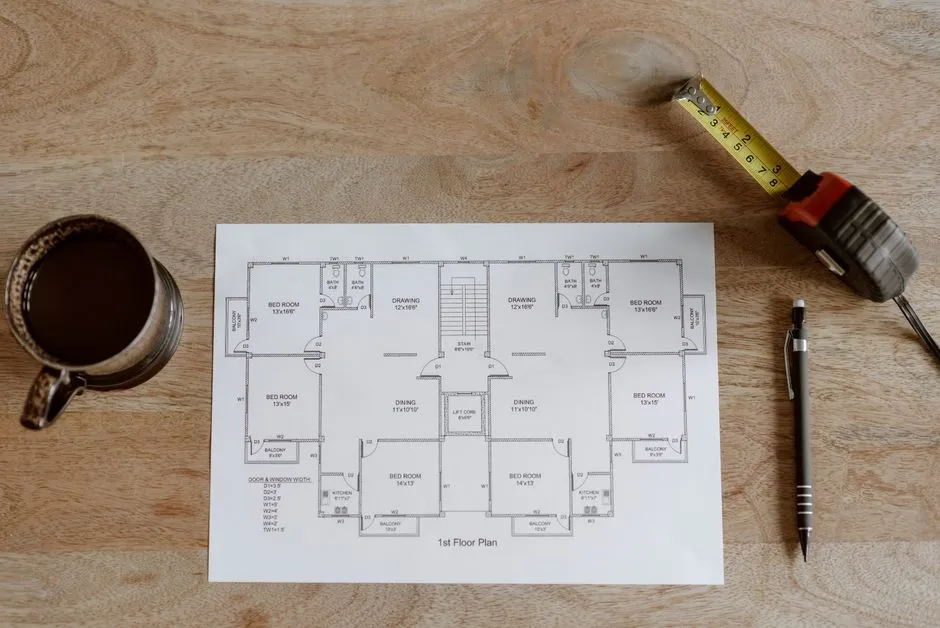
A mood board tells you what you like. A measured floor plan tells you what will actually fit. Start by recording the room's length, width, ceiling height, and the exact location of windows, doors, plumbing, electrical outlets, and vents. Measure in inches or millimeters, not feet alone, because cabinet and appliance specifications use precise increments. Include door swings and the space each door needs to open fully. In a 3D model you can place those constraints once and test every design against them. That beats graph paper, where it is far too easy to draw a 42-inch refrigerator in a 41-inch opening and not notice until delivery day.
- Overall room length, width, and ceiling height, measured in at least three places on walls that may not be square.
- Window and door openings, including trim and casing, plus the direction and full arc of every swing.
- Plumbing and gas rough-in locations for the sink, dishwasher, refrigerator, and range.
- Electrical outlets, switches, and dedicated circuits for major appliances.
- Structural limits such as columns, soffits, vents, and any wall that is load-bearing or cannot move without a permit.
Test the Work Triangle Before You Lock the Layout
The kitchen work triangle connects the sink, cooktop, and refrigerator. In a functional kitchen, each leg should be long enough to feel open but short enough to keep movement efficient. A common planning range is 4 to 9 feet per leg, with the three legs totaling roughly 12 to 26 feet. These are planning guidelines, not code, but they expose a refrigerator placed too far from the prep zone or a cooktop stranded across a busy aisle. In ArchiMaster 3D Kitchen & Bath you can drag appliances and immediately measure the triangle, so you see whether a 12-foot island creates a 14-foot walk between sink and range. Test alternate placements before you settle on a single configuration.
Compare at least two island and peninsula configurations
An island is a structural decision, not a styling decision. A 10-foot island can block the refrigerator if it sits too close, or it can become useful prep space if shifted 18 inches toward the dining area. Model one layout with an island and one with a peninsula or a galley run, then walk both in 3D. Check aisle widths: the National Kitchen and Bath Association recommends at least 42 inches for a single-cook aisle and 48 inches for a multi-cook aisle. If your model shows a 36-inch aisle, move the island before you commit. Software that snaps objects to exact dimensions makes this comparison fast enough to run before dinner, rather than after you have ordered cabinets.
Choose Cabinets and Appliances From a True-to-Scale Library
Generic shapes hide fit problems. A real 36-inch cooktop needs landing space on both sides. A real dishwasher needs room for its door to open without hitting an island. A real refrigerator often needs an extra inch or two behind and above for air circulation. When you design with a library built from real product dimensions, those constraints appear on screen. ArchiMaster 3D includes a catalog of cabinets, appliances, fixtures, and countertops sized to standard residential products, so you can drop in a 30-inch range and see exactly how it sits against a bank of drawers. The same catalog lets you swap door styles, counter materials, and hardware without redrawing the room, which is where most of the fun begins.
Use 3D Views to Catch Clearance and Lighting Problems
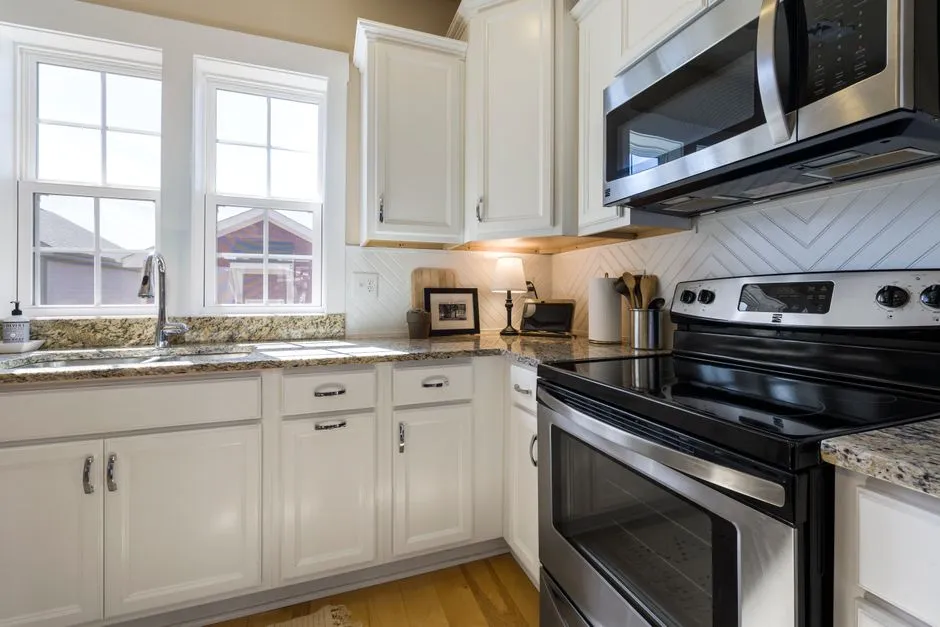
A 2D plan cannot show that a pendant light hangs at eye level between the sink and the pass-through, or that a tall pantry cabinet blocks the only window that brings morning light to the prep counter. Switch to a first-person 3D camera and stand inside the model. Check sightlines from the sink, the range, and the entry. Look for corners that feel cramped, upper cabinets that crowd the window, and shadows that hide knife work. Photorealistic rendering helps because materials and light behave closer to reality: a glossy white cabinet in a dark corner reads differently than it does in a catalog thumbnail. Walk the space at counter height and at standing eye level, around 5 feet 6 inches, to sense the real room.
“A tape measure records what is. A 3D model shows what happens when you move the island 18 inches toward the window.”
Check clearances at the appliance doors, not just the casework
The most common clearance failure is not the cabinet size, it is the door swing. A 36-inch refrigerator can fit a 36-inch opening but still fail if a side wall prevents the door from opening past 90 degrees. The same is true of a dishwasher next to a corner base cabinet, where the open door can block the sink. In 3D, select each appliance and verify its open-door arc against the adjacent objects. View the model from above to see the full swing path. ArchiMaster 3D lets you place moving parts and check them in plan view, which turns a two-minute inspection into a saved callback after installation.
Turn the Final Model Into a Shopping and Contractor Brief
Once the model works, do not stop at a screenshot. Export dimensioned floor plans, an elevation view of each wall, and a rendered perspective of the finished kitchen. Add a material list that includes cabinet widths, drawer bank heights, countertop edge profiles, and appliance model numbers. This package becomes the brief you hand to a contractor or cabinet supplier, and it removes the ambiguity from phrases like 'open up the kitchen.' A homeowner who arrives with a 3D model and a dimension set is asking for accurate quotes, not open-ended estimates. For current budget benchmarks by project scope, see our 2026 renovation statistics roundup.

What Makes Kitchen Design Software Worth Using
Look for three things in a kitchen design tool. First, it should be purpose-built for residential rooms, not a generic CAD environment that requires you to know drafting. A home-specific tool already understands walls, cabinets, countertops, and appliances as objects with real relationships. Second, it should offer true-to-scale content and dimension snaps, so a 24-inch base cabinet lands exactly 24 inches, not approximately. Third, it should render photorealistically, because finishes are a visual decision and you need to see the quartz or butcher block in the room's actual light. ArchiMaster 3D Kitchen & Bath shares one modeling and rendering engine with the other ArchiMaster 3D editions, so the same file can move from a kitchen model to a whole-home design later. It is a one-time license, not a monthly subscription, so your kitchen file stays yours.
- Do I need architectural experience to design a kitchen in 3D?
- No. Home-specific 3D tools such as ArchiMaster 3D Kitchen & Bath use walls, cabinets, and appliances as objects that snap to real dimensions. You start with a measured room, place windows and doors, then drag cabinets and appliances into place. The software handles joints, dimensions, and perspective, so you do not need to know drafting or CAD commands.
- What is the best way to measure a kitchen for 3D design?
- Measure in inches or millimeters and record overall length, width, and ceiling height in at least three locations. Add window and door openings, trim, door swings, plumbing and gas rough-ins, and outlets. Measure existing fixture depths and heights too. The more as-built detail you enter, the more accurate the 3D model will be.
- Can I use 3D kitchen design software on a regular Windows laptop?
- Yes, ArchiMaster 3D runs on Windows desktops and laptops without a high-end workstation. Photoreal rendering may take longer on older hardware, but modeling, dimensioning, and editing work on everyday machines. Check the current system requirements on the downloads page before installing.
- Can I get accurate cabinet quotes from a 3D model?
- You can get much closer to accurate quotes when the model includes true dimensions, drawer bank sizes, door styles, and appliance openings. Export the dimensioned plan and material list, then share it with a cabinet supplier or contractor. The model removes the guesswork from takeoffs and helps suppliers price the same scope.
- Should I design in 2D first or go straight to 3D?
- Start with a 2D plan view to enter walls, windows, doors, and major dimensions. Switch to 3D once the shell is accurate, then test layout options, clearances, and finishes. The 2D view keeps you precise; the 3D view keeps you grounded in how the room will actually feel.
Try the kitchen design workflow in this guide with a free trial of ArchiMaster 3D Kitchen & Bath. Build your measured room, test two layouts, and render the result before you buy a single cabinet.
Download free trial- Who
- Written by Ahmed El Alaoui, editorial direction & marketing analytics at Richdale AI, the company behind ArchiMaster 3D.
- How
- Drafted with AI assistance from the ArchiMaster 3D Kitchen & Bath feature set and checked claim by claim against the product fact sheet on Sep 9, 2026. Photographs are stock illustrations, not renders from the software.
- Why
- Help homeowners get a kitchen or bathroom layout right to the inch before they order cabinets or hire a contractor.
Ready to design with confidence?
See which edition fits the space you’re designing.