
 FIG·01
To import an AutoCAD DWG into ArchiMaster 3D, open a new project, choose File > Import, select the DWG file, set the import units to match the DWG's drawing units, and keep the geometry on a locked reference layer. That sequence prevents scale errors and layer chaos before you trace the first wall. ArchiMaster 3D is a 3D home-design software modeler, not a full AutoCAD replacement, so the realistic goal is a clean, scaled underlay you can snap to. The steps below cover unit matching, layer mapping, and the four import failures that cause the most support tickets.
- Import the DWG before you set project walls and floors; adding it later can shift snaps and layers.
- Set import units to the DWG's INSUNITS value, not your final project unit. Most wrong-size imports are a 12x or 25.4x factor.
- Keep imported geometry on its own layer and lock it before tracing walls, doors, and windows.
- Purge and overkill the DWG in AutoCAD before import to remove hidden blocks that bloat the model.
- Run Zoom Extents after import. If the drawing is a dot or fills the screen, the unit match was wrong.
Step 1: Clean the DWG Before You Export
AutoCAD files carry more than lines. They carry blocks, proxies, invisible hatches, and annotation scales that ArchiMaster 3D has to parse. Start in AutoCAD or any DWG editor: run PURGE to remove unused layers, blocks, and styles, then run OVERKILL to delete duplicate and overlapping geometry. A typical builder plan often shrinks dramatically after those two commands, and the import becomes faster. If the file came from a surveyor, bind only the XREFs you actually need. Nested external references are the most common cause of missing geometry after import. In the same session, type UNITS and note the insertion scale. Set INSUNITS to 0 (unitless) or to the real unit, then save as a 2018 or 2013 DWG. Older formats import more predictably than the newest 2026 files, and you lose nothing for floor-plan tracing.

Step 2: Import the DWG into ArchiMaster 3D
Open ArchiMaster 3D and start a new project with the units you want for the final model, imperial for a U.S. remodel or metric for a European kitchen. Choose File > Import and select DWG or DXF. In the import dialog, find the units field. This is the critical decision: set it to the DWG's drawing unit, not the project unit. If the AutoCAD architect drew one unit as one millimeter, importing as inches makes every 3,000 mm wall become 3,000 inches, roughly 25.4 times too large. If the DWG is in feet and you import as inches, the plan is 12 times too small. DWG import is included in ArchiMaster 3D Expert and Ultimate Home Design, and the same workflow applies across editions. Check Zoom Extents immediately after import. A floor plan should fill the screen at roughly building scale; a tiny dot or a line that shoots off screen signals the wrong scale factor.
Match the import units to the file, not to the project
ArchiMaster 3D separates import units from project display units. That means you can import a metric survey into an imperial project and still trace correctly. After import, open the drawing properties and verify the measured length of a known wall. Use the Dimension or Measure tool on a door opening or wall run. A 900 mm door opening should read 900 mm or 35.4 inches, depending on your project display. If it reads 2,953 mm or 2.8 inches, the scale factor is wrong. Undo the import, redo it with the correct source unit, and measure again before doing any modeling.
Step 3: Keep the Layer Structure Intact
The mistake that destroys a good import is exploding the DWG. Exploding merges every line, block, and text into one undifferentiated pile, losing the layer names that help you isolate walls, doors, windows, and dimensions. Instead, when ArchiMaster 3D asks how to handle the file, keep the original layers. If your version offers layer mapping, map A-WALL, A-DOOR, A-GLAZ, and A-ANNO-REFR to your project's wall, door, window, and annotation groups. If it does not offer mapping, import everything as a locked reference layer and use layer visibility to work one system at a time. The goal is a floor plan you can trace, not an editable CAD drawing.
“A DWG is an underlay, not a finished model; treat it like tracing paper, not framing lumber.”, ArchiMaster 3D Journal
Use layer colors and line weights as a visual guide
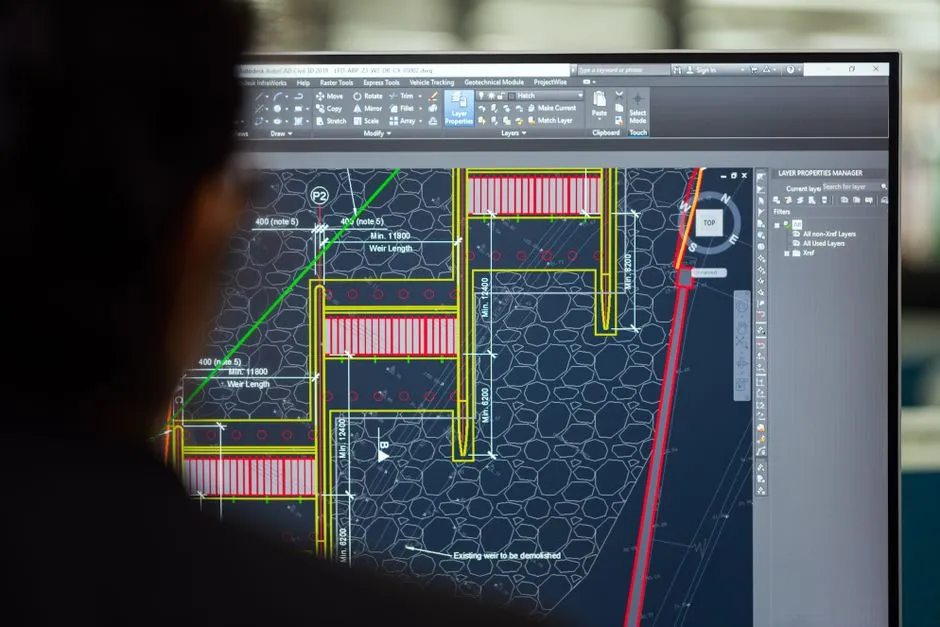
AutoCAD layers often use color to signal function: yellow for walls, cyan for windows, red for dimensions. ArchiMaster 3D preserves those colors on import, so keep the DWG layer colors turned on while tracing. Set the imported reference layer to 50 percent opacity or lock it so selection snaps do not grab CAD linework. If you need to isolate one system, turn off everything except the A-WALL or A-DOOR layer and trace each system in sequence. This layer discipline speeds up modeling and prevents accidental moves of imported geometry.
Step 4: Fix the Four Import Failures That Cause Most Support Tickets

- Missing XREFs. Bind external references in AutoCAD before exporting; otherwise walls from the surveyor or structural base will not appear.
- Wrong scale. A plan that is 12x or 25.4x off means the import unit did not match INSUNITS. Reimport with the correct source unit.
- Blank screen after Zoom Extents. The drawing may be at a huge coordinate far from 0,0. Move or copy geometry to the origin in AutoCAD before export.
- Exploded layers. Use Undo immediately and reimport with layers intact, then lock the reference layer before tracing.
Step 5: Trace Walls, Doors, and Windows Without Rebuilding the Plan
Once the DWG is locked and scaled, use ArchiMaster 3D's wall tool to trace over the underlay. Start at a corner and click along the outside face of walls, letting snapping find endpoints and intersections. The imported plan gives you true geometry, but the walls you draw become the 3D model with floor height, thickness, and materials. Do not trace door and window openings as solid walls. Instead, place doors and windows from the features library at the exact rough openings shown on the plan. For multi-story plans, copy the underlay to a new floor level and trace each floor independently, so wall heights and floor platforms line up.
Snap to endpoints and let the underlay do the measuring
Turn on endpoint, midpoint, and intersection snaps before tracing. Snap to the CAD geometry, not to the grid, so door openings land at the right rough width. If the underlay was drawn with centerlines for walls, offset your traced wall by half the wall thickness. For a six-inch framed wall, offset by three inches; for a 200 mm block wall, offset by 100 mm. This single adjustment fixes the most common error in imported plans: walls with the correct shape but the wrong position.
- Can ArchiMaster 3D open AutoCAD DWG files directly?
- Yes. ArchiMaster 3D Expert and Ultimate Home Design import DWG and DXF files directly through File > Import. The importer reads 2D linework, layers, colors, and blocks. You can then trace walls, doors, and windows over the imported plan. You do not need AutoCAD installed.
- Why is my imported DWG the wrong size?
- Almost always the import unit did not match the DWG's drawing unit. If the file stores one unit as millimeters and you import as inches, the plan is 25.4 times too large. If the file stores feet and you import as inches, it is 12 times too small. Reimport with the source unit, then measure a known door or wall to verify.
- Does ArchiMaster 3D preserve layers from a DWG?
- Yes, when you choose to keep the original layers. Do not explode the import. Lock or dim the reference layer, and use the layer list to isolate wall, door, window, and annotation layers while you trace. This keeps the imported geometry from merging into an unusable pile.
- Do I need the Expert edition to import AutoCAD files?
- DWG and DXF import is available in ArchiMaster 3D Expert and Ultimate Home Design. The Kitchen & Bath and Landscape & Deck editions focus on their own spaces and do not include the DWG importer. Check the pricing page for a side-by-side edition comparison.
Ready to test your own floor plan? Download ArchiMaster 3D and import a DWG in less than five minutes.
Start free trialReady to design with confidence?
See which edition fits the space you’re designing.