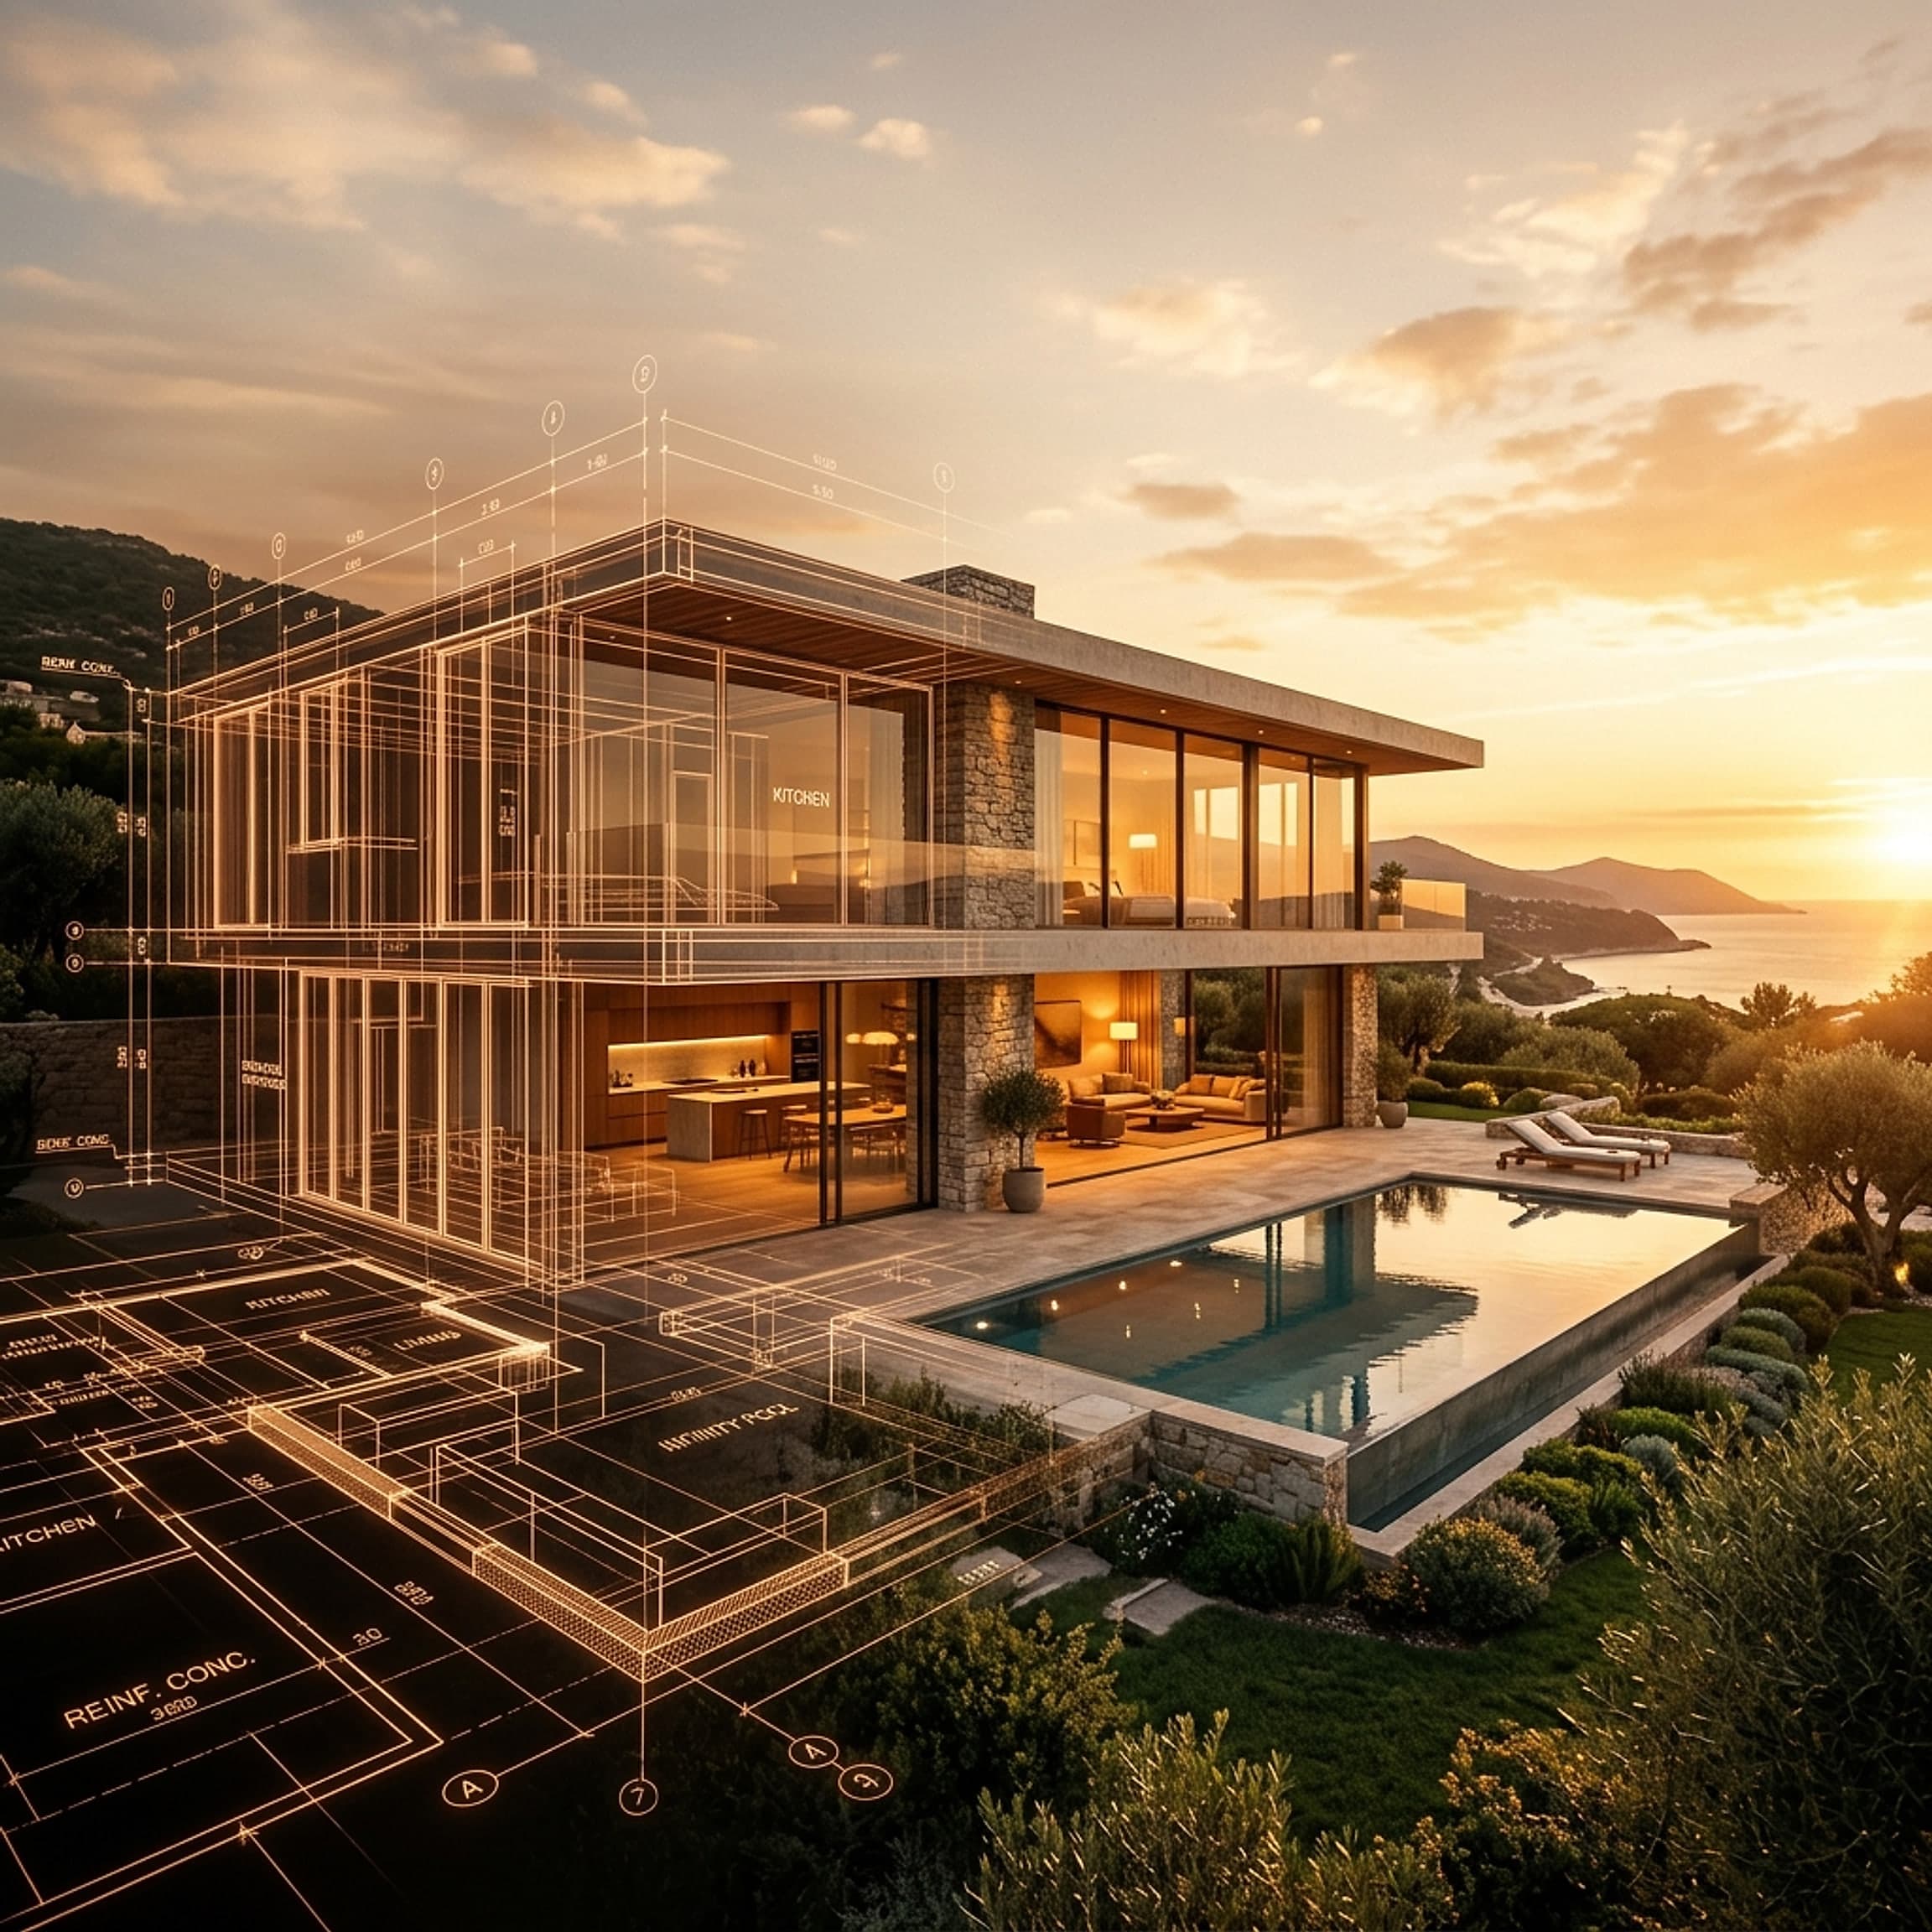

 FIG·01
The gap between a set of measurements and a client-ready render used to be measured in days. With the right workflow it's an afternoon. Here's the path we recommend.
1. Start true to scale
Bring in your survey or sketch and trace the walls with smart dimensions on. Snapping and code-aware guides keep everything honest, so what you draw is what gets built.
2. Let the model build itself
Pull walls up and the structure follows: openings, roofs, and levels stay coordinated. Change a ceiling height and the whole model updates, because the geometry is parametric, not pasted.
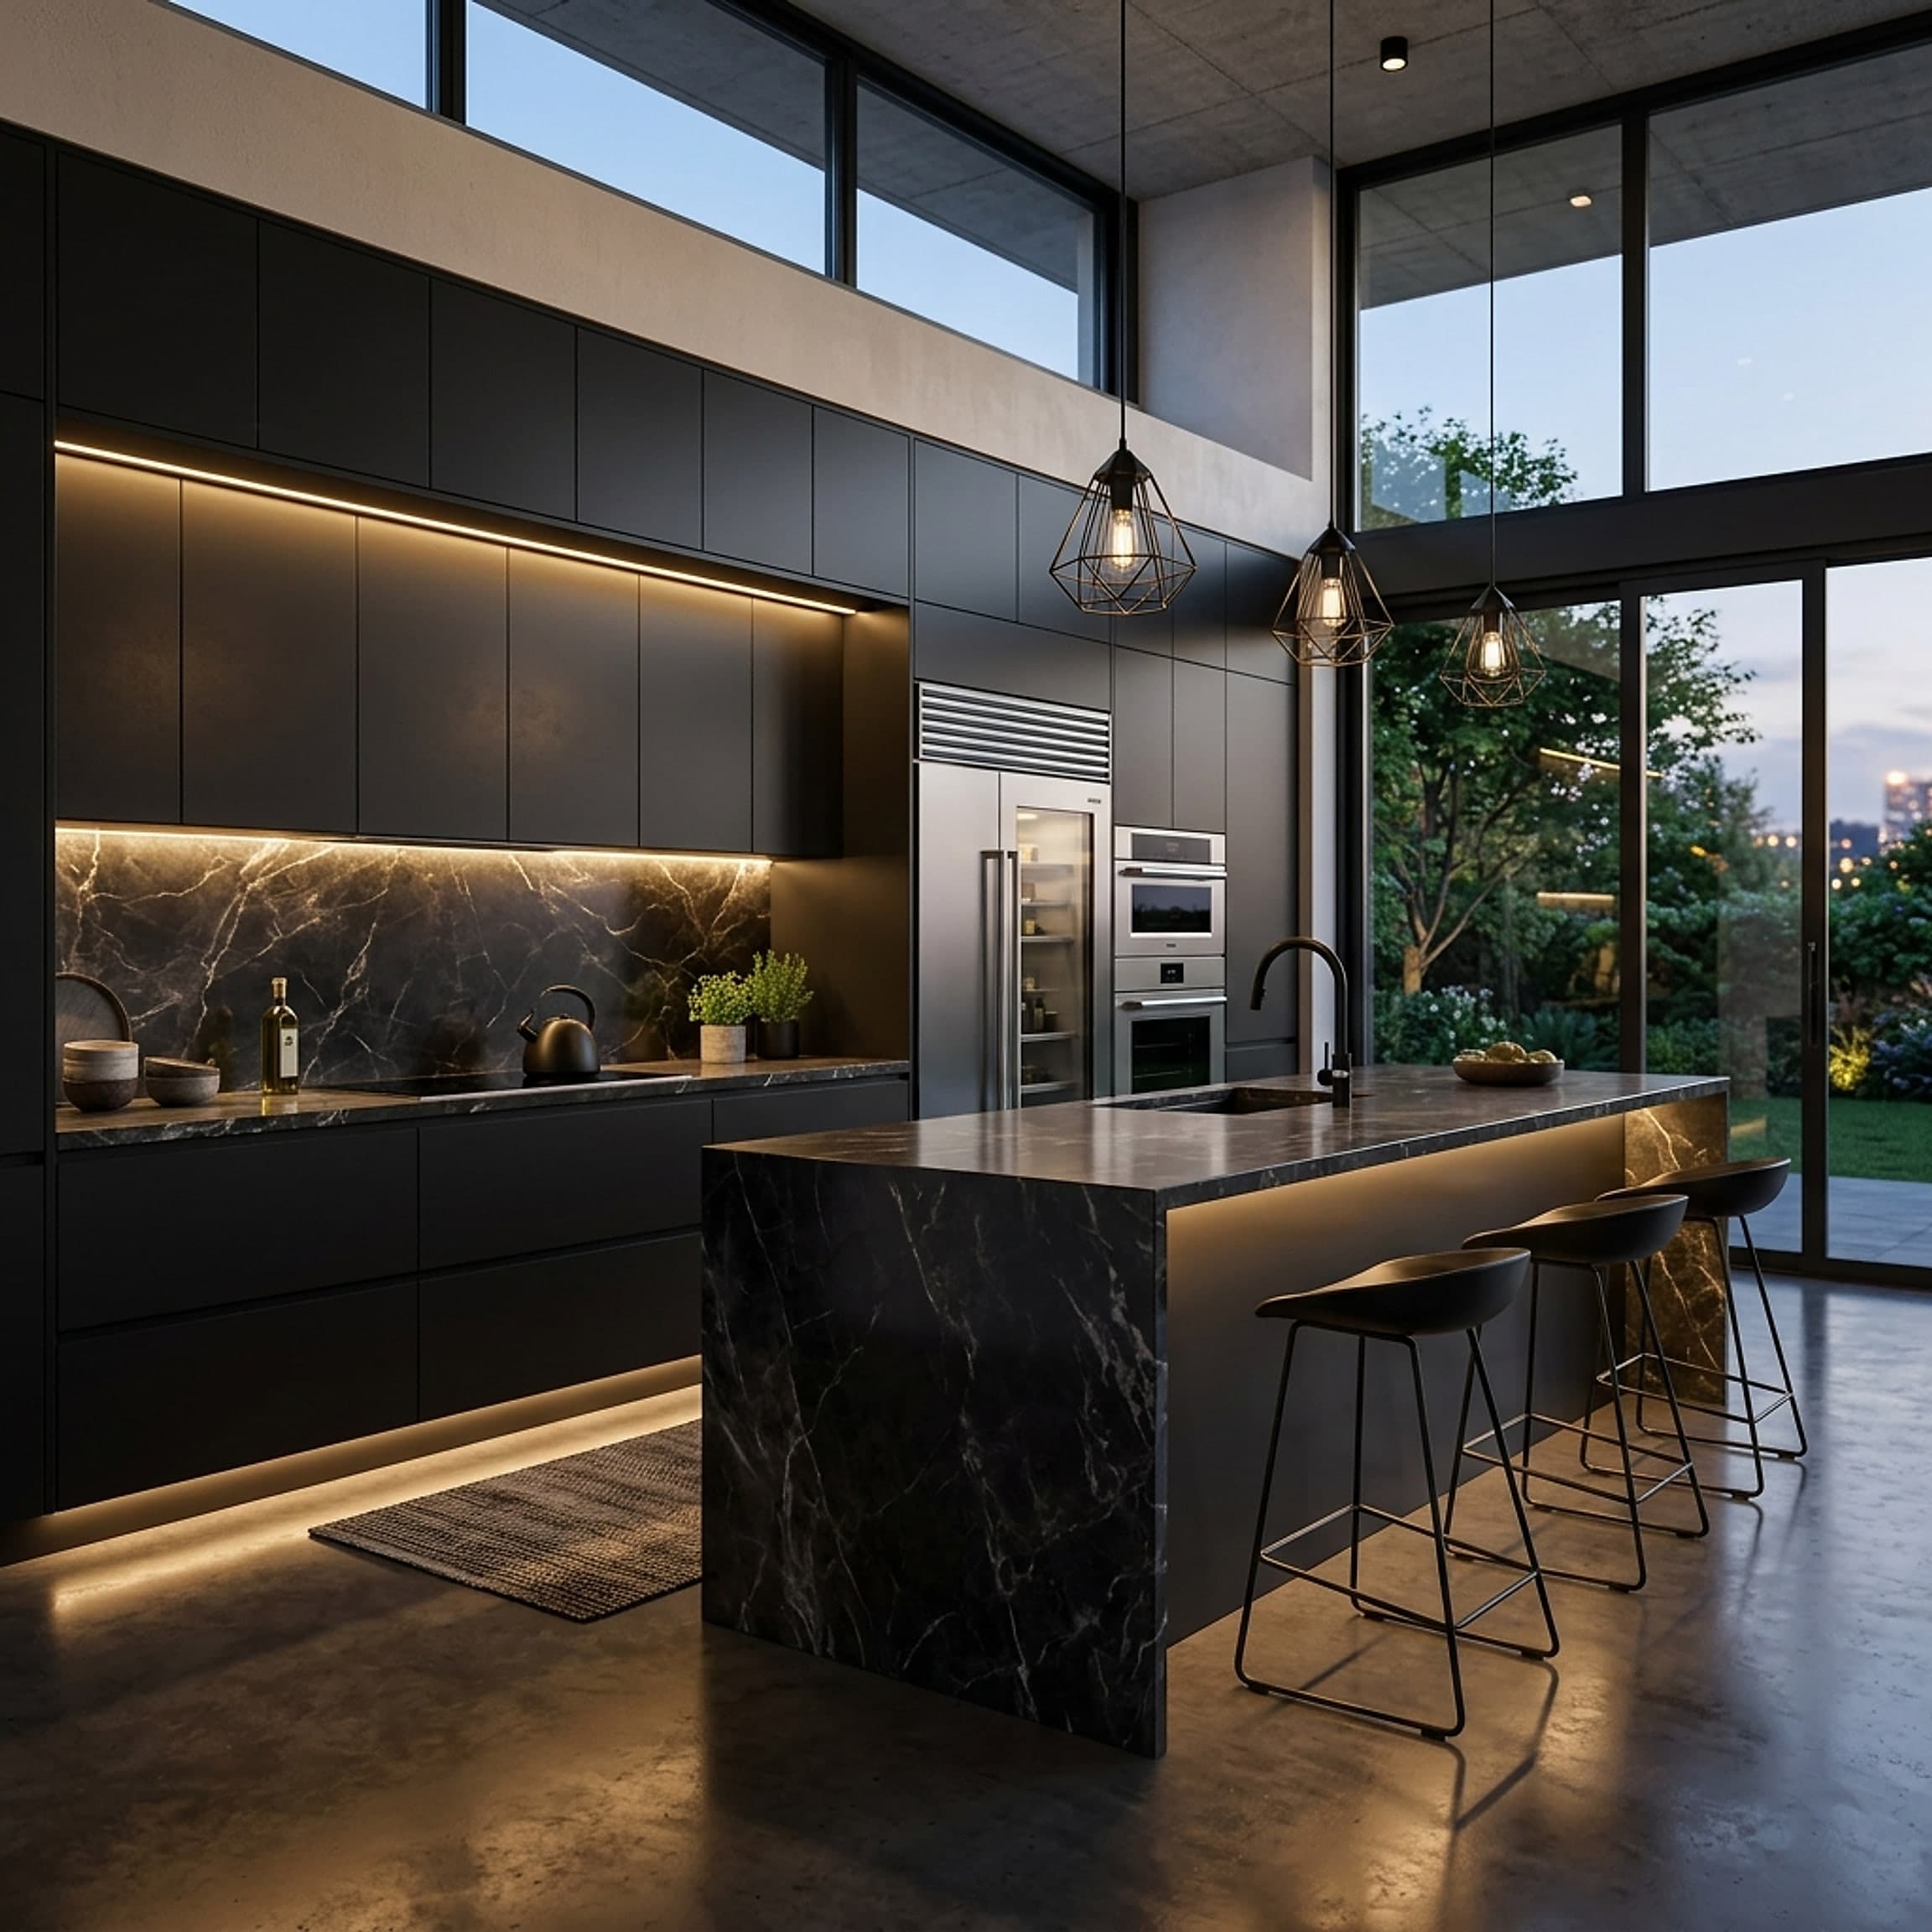
3. Furnish and finish
Drop in real furniture, fixtures, and finishes from the library. Everything is to scale, so a sofa that fits in the model is a sofa that fits in the room.
- Work in real materials like oak, brushed brass, and honed stone, not flat colours
- Place lights where they'll actually go; the engine respects them
- Save a few camera angles early so you can compare options later
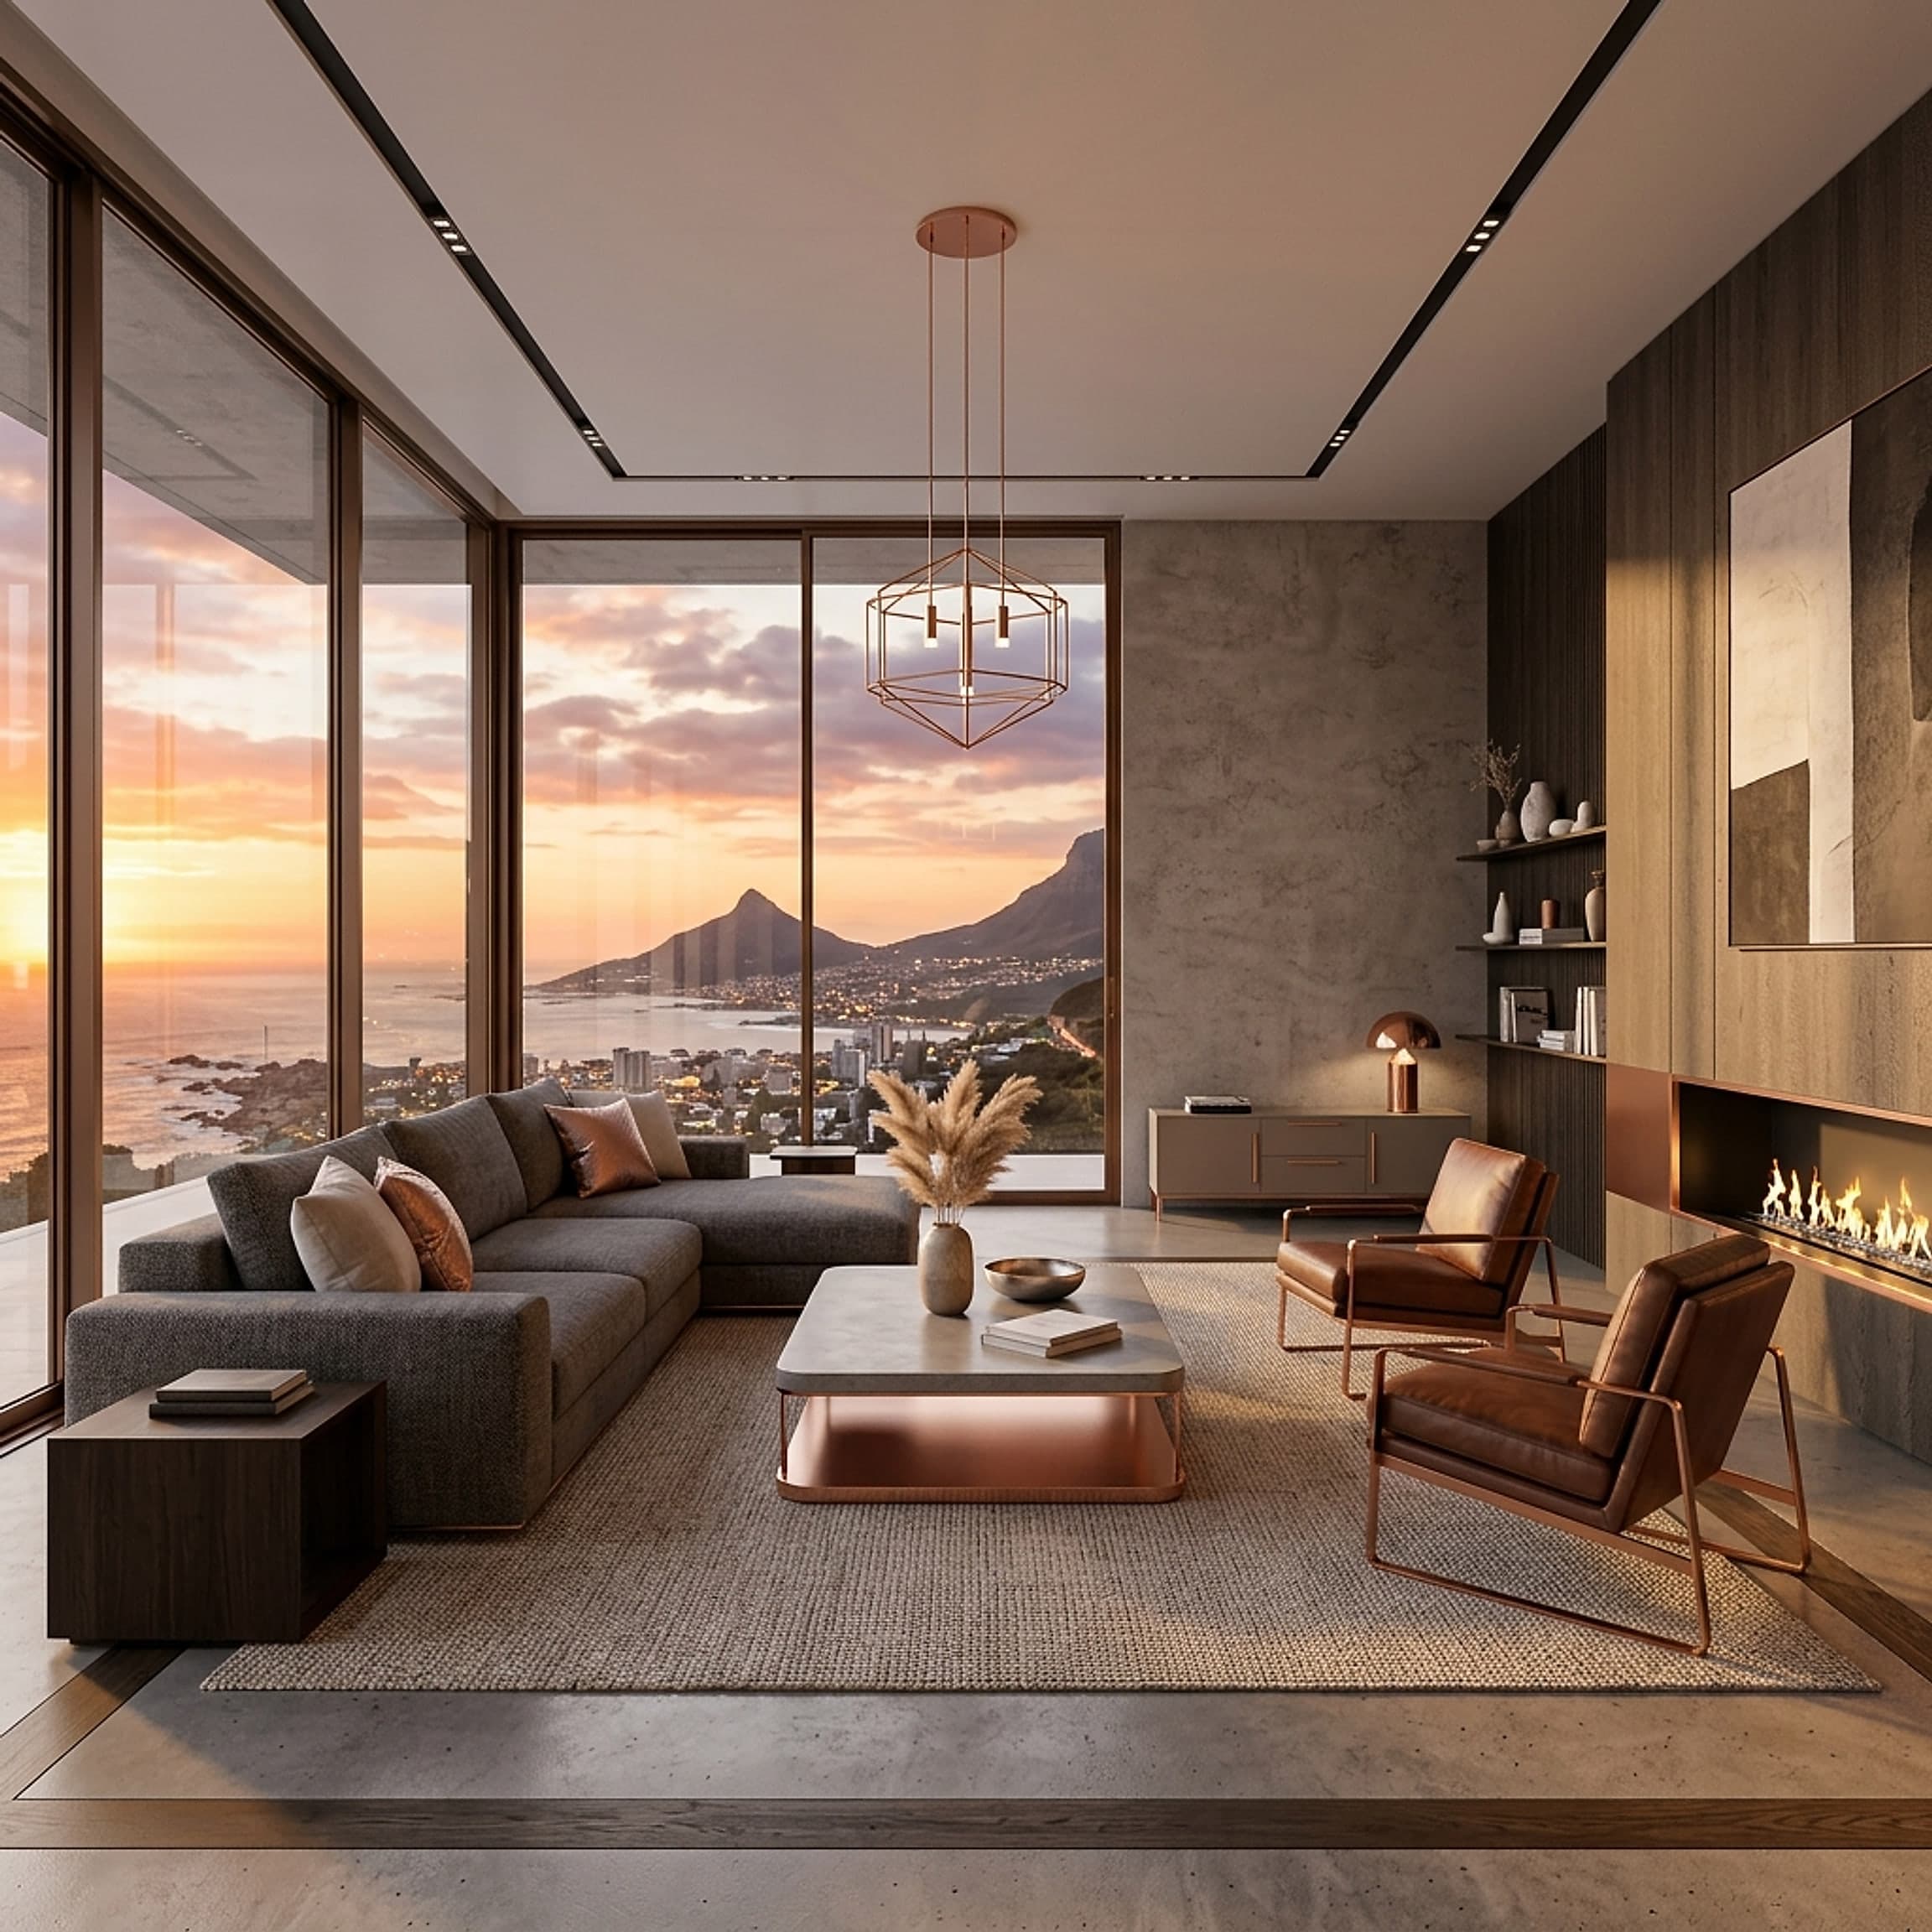
4. Render the conversation
Frame the shot, set the time of day, and let the GPU engine resolve. Natural light does most of the work: a render that reads as honest persuades far better than one that reads as a sales pitch.
“Clients don't buy floor plans. They buy the feeling of standing in the room.”, From the studio
Hand that image over and watch the conversation change. That's the whole point.
Ready to design with confidence?
See which edition fits the space you’re designing.