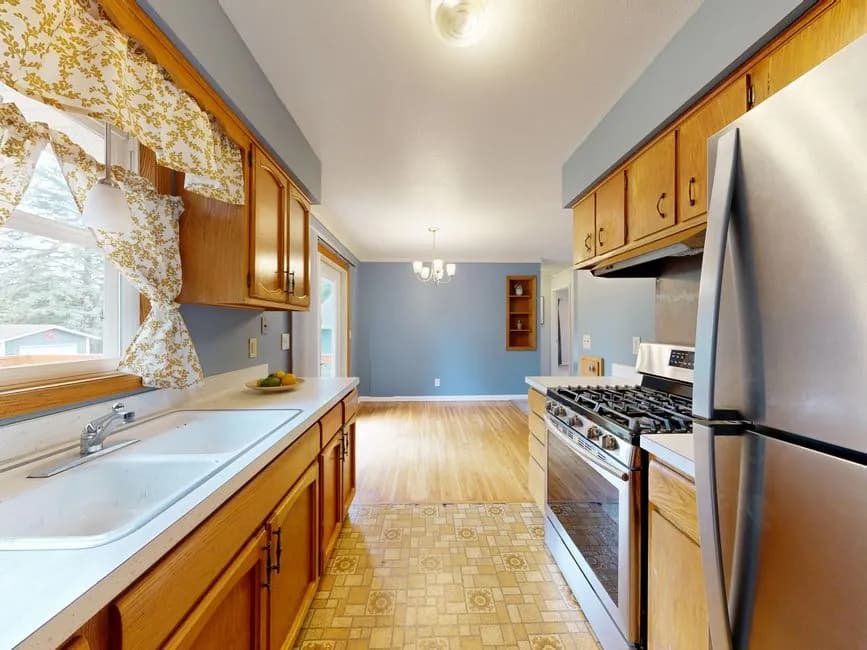
 FIG·01
In ArchiMaster 3D, you can model a full kitchen cabinet layout from an empty room in about 45 minutes. Follow this sequence: enter the room's true dimensions, place doors and windows, block work zones, build the cabinet run, add appliances and the sink, then apply materials and run a photoreal render to catch clearance mistakes. This is the same step-by-step method covered in How to Design a Kitchen Layout in 3D Before You Remodel, compressed into one focused session for a first-time modeler.
- Start with the room shell and fixed obstacles, not cabinets. Correct wall lengths, ceiling height, and door swings make every later cabinet fit real clearances.
- Block the work triangle and landing zones before placing cabinets: 42 to 48 inches of aisle, 15 inches beside a fridge, and 18 inches beside a cooktop.
- Build base cabinets first at 24 inches deep and 34.5 inches high, then wall cabinets at 12 inches deep and 18 inches above the countertop.
- Run a photoreal render at the 40-minute mark. It exposes visual collisions, fixture shadows, and aisle pinch points that 2D plans hide.
Before You Start: Software, Measurements, and Room Shell (Minutes 0–5)
Use ArchiMaster 3D Kitchen & Bath or Ultimate Home Design. Both share the same kitchen cabinet library and parametric sizing engine, so the steps below work across editions. If you are evaluating the software, the free trial lets you follow this tutorial with a sample kitchen or your own measurements. Prepare a floor plan with wall lengths, door and window positions, ceiling height, and the locations of plumbing, the range hood vent, and electrical outlets. Open a new project and draw the room rectangle to actual wall-to-wall dimensions, not furniture dimensions. Type feet and inches directly into the wall tool, so a 12-foot-2-inch run stays exact. Set ceiling height to the real value, often 8 feet, 9 feet, or 10 feet. If the room is not a clean rectangle, draw the main rectangle and then add bump-outs. A measured shell prevents the most common beginner error: a cabinet run that cannot physically fit the wall.
Place Doors, Windows, and Fixed Obstacles (Minutes 5–10)
Before any cabinet, drop the door and window objects into the walls at their measured distances from corners. Model the door as a swinging object and open it in 3D view to check the arc; a door swing can block a dishwasher or a base cabinet. Mark the locations for the range hood vent, plumbing, and any radiator or bulkhead. These fixed points decide whether a cooktop can sit on a wall or must shift. If you are working from an existing kitchen, capture the shell first with the method in Model Your Existing Kitchen for Fall 2026, then overlay the new layout.
Block Work Zones Before Dropping Cabinets (Minutes 10–20)
Place placeholder zones or simple geometry for the sink, refrigerator, and cooktop first. The 3D kitchen planner step by step method works best when the work triangle is set before cabinet boxes. Keep the combined sink-to-cooktop-to-refrigerator distance under 26 feet total, with no leg shorter than 4 feet. Leave 42 to 48 inches of clear aisle for a single-cook kitchen and 48 to 54 inches for a kitchen with barstool seating behind a work aisle. Add landing space: 15 inches on the latch side beside a refrigerator, 18 inches beside a cooktop on one side, and 24 inches beside a sink. These NKBA-derived guidelines prevent a beautiful cabinet run that is unusable in daily life.

Build the Cabinet Run and Add Appliances (Minutes 20–40)
Switch to the cabinet tool and place base cabinets along the wall. ArchiMaster 3D's kitchen cabinet catalog includes framed, frameless, and open-shelf styles, and each cabinet width is parametric. Standard base cabinets are 24 inches deep and 34.5 inches high with the countertop; widths run from 9 to 48 inches. Start from a corner with a blind corner cabinet or lazy Susan, then add sink bases, drawer stacks, and a pull-out trash cabinet. Wall cabinets are 12 inches deep and typically start 18 inches above the countertop. Keep wall cabinets off the primary cooktop line by at least 24 inches vertically or use a range hood sized to the cooktop.
- Place a corner cabinet first at each inside turn; it locks the run geometry.
- Leave 3 inches of filler at walls or appliances so doors and drawer fronts do not bind.
- Use a 36-inch-wide sink base for a 33-inch sink, and a 30-inch base for a 24-inch cooktop only if clearance allows.
- Set the dishwasher adjacent to the sink bowl, not behind the primary prep zone.
Adjust any cabinet by selecting it and editing width, height, and toe kick in the properties panel. This is where the 45-minute method saves hours over paper: test a 36-inch stove hood against a 48-inch run without redrawing.
Add Appliances and the Sink (Minutes 35–40)
Drop in the cooktop, oven, refrigerator, dishwasher, and sink from the object library using true dimensions from the manufacturer's cut sheet. Many refrigerators are 36 inches wide but need 38 to 40 inches of opening for ventilation and door swing. A 30-inch slide-in range usually requires a 30-inch cabinet opening, but the actual cutout differs by model. In ArchiMaster 3D, set the appliance depth to show the true protrusion past the counter, which reveals whether a refrigerator will block a walkway when its doors are open. If the kitchen has a wall oven, model its cabinet tower at 24 inches deep and 84 to 90 inches high.
Materials, Lighting, and the Final Render (Minutes 40–45)
Apply cabinet door materials, countertop finishes, and backsplash tile. Then set a daytime scene and run a photoreal render from eye level, roughly 5 feet 6 inches high. The render is not just a pretty picture. It shows whether upper cabinets cast a shadow over the main prep area, whether the island pendants hang too low, and whether the tile pattern visually competes with the cabinet fronts. Switch to orthographic top view to confirm aisle widths before exporting. This final visual check is the same workflow described in What 3D home design software does, and it is the fastest way to catch a design you have stopped seeing.

Common Layout Mistakes the 3D Model Reveals
The reason to model before you buy is that a 3D model exposes spatial errors that paper plans and mood boards cannot. Watch for these issues when you review the render and top view.
- Designing the room without measuring door swing; an open refrigerator door can block 30 inches of walkway.
- Putting the dishwasher across from the sink, which forces you to carry wet dishes across the aisle.
- Using default wall cabinet height without checking the ceiling; stacked cabinets need at least 96 inches of ceiling for two rows.
- Forgetting landing space beside the cooktop, which pushes hot pans onto a narrow strip of counter.
- How long does it take to design a kitchen in ArchiMaster 3D?
- A first-time user can complete an empty-room-to-cabinet-layout model in about 45 minutes when the room dimensions and appliance specs are already measured. Experienced users can finish faster, and complex rooms with islands, bump-outs, or wall ovens may take 60 to 90 minutes. The 45-minute estimate assumes a single-wall, L-shaped, or U-shaped kitchen with standard cabinet runs.
- Can I design kitchen cabinets in ArchiMaster 3D without CAD experience?
- Yes. The kitchen cabinet tools use parametric placement, so you drop a cabinet from the catalog and edit its width, height, and finish in the properties panel instead of drawing it line by line. The room tool accepts feet and inches typed directly, and the 3D view updates as you work, which is why many kitchen planners use it as a step-by-step design tool.
- What are the standard kitchen cabinet dimensions in ArchiMaster 3D?
- Base cabinets are 24 inches deep and 34.5 inches high with the countertop, with widths from 9 to 48 inches. Wall cabinets are 12 inches deep and usually mounted 18 inches above the countertop. Tall cabinets and wall oven towers are 24 inches deep and commonly 84 to 90 inches high. You can change any dimension to match custom or semi-custom cabinets.
- Can I test different cabinet colors and backsplash in the same model?
- Yes. Apply a finish to a cabinet run, render a view, then switch the material and render again without rebuilding. This works for door colors, countertop materials, backsplash tile, and floor finishes. The photoreal render uses the same lighting and camera angle, so the comparison shows how the materials change the room's feel.
Start the same 45-minute kitchen layout in ArchiMaster 3D. Download the free trial, open the Kitchen & Bath workspace, and model the dimensions from your own floor plan.
Download free trialReady to design with confidence?
See which edition fits the space you’re designing.