
 FIG·01
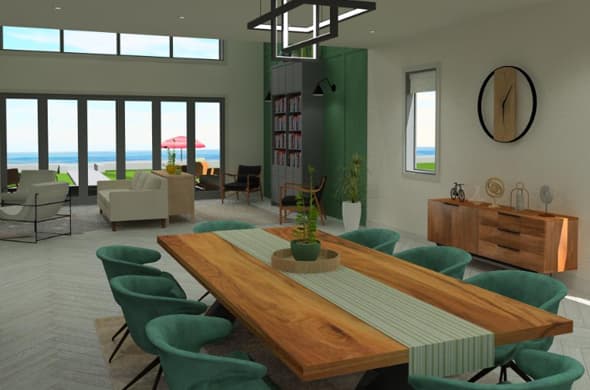
Designing a kitchen in 3D using ArchiMaster 3D begins with drawing your room’s exact dimensions on a digital floor plan, then dragging cabinets, appliances, and finishes into place while a photorealistic 3D view updates in real time. This complete walkthrough guides you from a blank screen to a fully detailed kitchen design, no prior CAD experience required. You will learn how to set up accurate measurements, build a functional work triangle, test layouts with a virtual walkthrough, and generate plans and material lists that a contractor can quote directly. Along the way you will pick up practical rules of kitchen geometry and avoid the clearance mistakes that derail so many DIY remodels.
- A kitchen design starts with precise room measurements and a clear definition of the sink–stove–refrigerator work triangle.
- ArchiMaster 3D’s drag-and-drop library places full cabinet runs and brand-name appliances on your floor plan in seconds, then renders them photorealistically.
- The software automatically calculates countertop overhangs, filler strips, and toe-kick details, eliminating hours of manual adjustments.
- A 3D walkthrough test reveals real-world issues such as drawer collisions, tight aisle clearances, and poor task lighting before you buy a single cabinet.
- Switching between 2D plan view and 3D perspective helps beginners understand how flat dimensions translate into a usable, spacious kitchen.
Step 1: Start with an Accurate Floor Plan
Open ArchiMaster 3D, a free trial is available for immediate download, and choose the Kitchen & Bath workspace. Begin by entering the room’s exact wall lengths, ceiling height, and the position of doors, windows, and plumbing rough-ins. If you have a laser-measured sketch or an existing blueprint, you can trace it as an underlay image; otherwise, use the room wizard to build the shell in minutes. Accuracy matters here because every cabinet, landing space, and walkway you place later will snap to these dimensions. A common beginner mistake is to approximate a wall as 144 inches when it is really 143½ inches, that half-inch gap becomes a problematic filler strip later. Build the envelope once, correctly, and the rest of the design falls into place.

Step 2: Place Cabinets, Appliances, and the Work Triangle
The Golden Triangle: Sink, Stove, Refrigerator
Before dropping in cabinets, locate your three primary work zones: the sink, the cooktop/range, and the refrigerator. The National Kitchen and Bath Association recommends that the sum of the three legs of this triangle measure no more than 26 feet, with no single leg shorter than 4 feet. In ArchiMaster 3D, you can drop placeholder symbols for each zone first, then draw dimension lines to check the total distance. This quickly reveals whether an island will obstruct the flow or whether the fridge door will block the main walkway when open. Leave at least 42 inches of aisle width between countertops and an island, and 48 inches if multiple cooks work simultaneously.
Using ArchiMaster 3D’s Drag-and-Drop Library
Open the cabinet catalog and select from framed, frameless, or custom-insert styles. Drag a base cabinet run onto a wall; the software automatically adds a countertop, toe-kick, and filler panels where needed, a huge time saver over manual CAD drafting. Wall cabinets snap to standard 18‑inch heights above the counter, but you can override any dimension. The appliance library includes sinks, ranges, hoods, dishwashers, and refrigerators from generic and brand-name catalogs. If you are planning a storage-rich remodel, the detailed cabinet tricks in our 2026 fall kitchen remodel feature show how to configure pull-out pantries and blind-corner solutions inside this same design environment.
- Leave a minimum 15 inches of countertop landing space on each side of the cooktop and refrigerator.
- Position the dishwasher so its open door does not block the main sink aisle, the walkthrough in Step 4 will confirm this.
- Reserve at least 36 inches of continuous counter on one side of the sink for prep work.
Step 3: Customize Materials and Finishes Instantly
Click any surface to open the material editor. Apply paint or stain colors to cabinet faces, swap countertop materials from laminate to quartz or butcher block, and tile a backsplash in hundreds of patterns. ArchiMaster 3D renders these changes photorealistically in seconds, letting you compare a white-Shaker-with-marble look against a walnut-slab-with-soapstone scheme side by side. One feature that experienced users lean on heavily is the Material Takeoff report. After finalizing the design, the software totals square footage of countertop, number of cabinet boxes, linear feet of molding, and even the count of knobs and pulls. That quantity list turns into an accurate shopping list, which helps you avoid ordering 30% too much tile or forgetting the end panels.
Step 4: Lighting, Views, and the Walkthrough Test
Add recessed ceiling lights, pendant fixtures over an island, and under-cabinet task strips directly from the lighting library. Switch to the daytime sunlight simulation to see how natural light falls across the countertops at different hours. Then run the 3D walkthrough, move through the kitchen at eye level, open cabinet doors and drawers, and pull out the oven rack. This is where invisible usability mistakes surface: a drawer that hits the opposite island overhang, a refrigerator door that blocks passage when fully open, or a walkway that feels generous on a flat plan but pinches to 36 inches in reality.
“Great kitchen design is proven not by a render, but by a virtual walkthrough where no cabinet door overlaps another.”
If a clearance fails the walkthrough test, return to the 2D plan, nudge the island or swap the hinge side of a door, and recheck. This iterative loop replaces the costly guesswork of traditional remodeling.
Step 5: Generate Plans, Dimensions, and a Material List
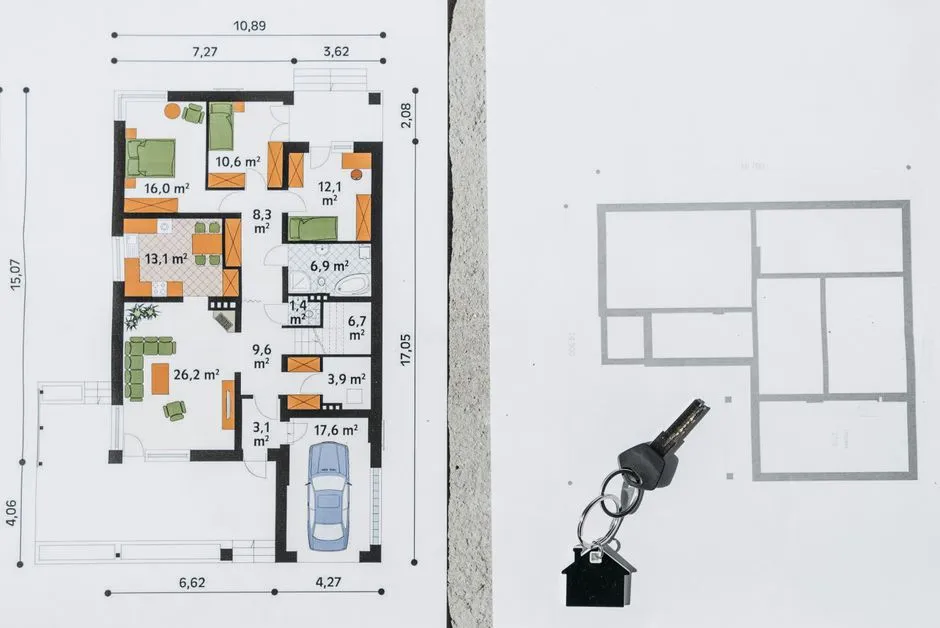
With the design finalized, switch to Plan View and add automatic dimensions. Print or export a to-scale floor plan that includes wall measurements, cabinet labels, and appliance locations, exactly what a contractor or cabinetmaker needs for a firm bid. The material list, as mentioned, quantifies every visible and structural component. For a full-home project that extends beyond the kitchen, the Ultimate Home Design edition carries the same engine into adjoining rooms, keeping the whole plan consistent. If you are exploring the broader landscape of remodeling tools, our 2026 comparison of home remodeling software explains where dedicated kitchen design programs like ArchiMaster 3D outperform general-purpose CAD suites in speed and detail.
Beyond the Basics: Advanced Kitchen Design Features
Once you are comfortable with standard layouts, experiment with custom island shapes, angled cabinet runs, furniture-style legs, and crown molding. The software's cabinet editor lets you combine modules into a single unit for a hutch or coffee station. Because every object sits on true-to-scale layers, you can also import the kitchen into the full house model, ensuring sightlines from the great room or dining area feel open and connected. Whether you start with the Kitchen & Bath edition or the comprehensive Ultimate Home Design package, the core engine is identical, so skills you learn here transfer across every room.
- Can I design a kitchen with ArchiMaster 3D if I have never used CAD software?
- Absolutely. The interface is built for beginners, with a drag-and-drop catalog, automatic cabinet fittings, and real-time 3D feedback. Most users place their first cabinet within ten minutes of opening the program.
- What file formats can I export my kitchen design to?
- You can export 2D floor plans as PDF or image files for contractors, and 3D views as high-resolution JPG or PNG renders. The software also generates dimensioned plans and material quantity reports suitable for quotes.
- Does the software include a library of actual appliance dimensions?
- Yes. The catalog includes standard sizes for ranges, refrigerators, dishwashers, and hoods, as well as optional brand-specific libraries. Every appliance is modeled at true scale, so clearances and door swings are accurate.
- Can I visualize different cabinet colors and countertop materials side by side?
- The material editor lets you change finishes with one click. You can save multiple design variations and switch between them or even create side-by-side rendered snapshots to compare aesthetics before committing.
- Is there a free trial available for ArchiMaster 3D?
- Yes, a fully functional free trial is available for download. It gives you access to the complete kitchen design tools so you can build and test your layout without any upfront cost.
Ready to transform your kitchen ideas into a buildable plan? Download your free trial of ArchiMaster 3D today.
Download Free TrialReady to design with confidence?
See which edition fits the space you’re designing.